Thursday, May 28, 2009

Sugar Wednesdays

I seem to be posting more about cakes these days than sewing. And for sure Wednesday afternoons have been all about Sugar with my friend Verdie for several years now. And this Wednesday was no exception. We are working on a cake to celebrate the various groups that meet within an organization in June. Part of decoration will be clusters of "people", and here is the beginnings of that: We needed a couple of dozen rosebuds to decorate a "cut up" cake, and as I was preparing for that I decided to do a quick tutorial on how to make these cute little rosebuds.
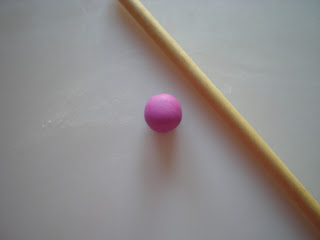
  1. Roll either fondant or a mixture of fondant and gumpaste out fairly thinly and cut circles. These are about 1" in diameter. You need three circles. If the fondant is very soft, leave the circles to dry out a bit before moving on to the rolling up part.
  2. Use a paintbrush to moisten each circle with a little water.
  3. Lay each circle overlapping the next.
  4. Start rolling, fairly tightly.
  5. Roll to the end.
  6. Divide in half and neaten the ends. You get two rosebuds from each roll.
  7. They are so quick to do. These were done in less than 20minutes.
I also worked a bit more on the fuchsias, and added the next step to the fuchsia tutorial which is further back in my postings.


*********************************************************************


If you love making gumpaste flowers, please read about my new 

Gumpaste Flower Tutorials Booklet, available in booklet form or PDF. 
The tutorial covers four lovely flowers: Tulip, Daffodil, Lily of the Valley and Gardenia.  Check it out at my Etsy shop here 


Tuesday, May 26, 2009

Cake overload!!

This past weekend I had three cakes due. A Baptism, a 70th birthday and my son's b/d. It was hard work on Thursday and Friday and I was happy with the results. My son's cake was a bit of fun as he is a staunch Toronto Maple Leaf Hockey fan. He lives north of Montreal and is usually up against Montreal Canadiens fans. Last year his b/d cake looked like a Maple Leaf jersey, this year here it is.........This is a 12" x 18" birthday cake for a friend of mine's father from British Guiana. The palm trees I made from fondant and used the PMM Exotic Lily Set petal cutter for the palm leaves.TheAn 8" baptism cake.When you live in a condo, one space doubles for other uses. This is my dining room/photo studio.

My favourite things RR - Vicky's block

Vicky's block features a lady in the centre surrounded by some pretty ribbon work by Cathy. I worked on the top left corner, shown below. I worked mostly in DMC Perle 8 and 12 which I found more delicate to use than the DMC Perle 5 that I normally embroider with. It will be on it's way to Deanna tomorrow.

Simple Solution

After my son-in-law loaded the heavy cumbersome computer monitor into my car and I had arrived home, before unloading I decided to try something that Jason had suggested as we said goodbye. He said, there should be a button or control on the outside of my monitor to adjust the brightness; and sure enough there was and I made the adjustments, and it was black to normal.

Saturday, May 23, 2009

Computer problems

All the photos in every program I use are so dark, that it's impossible for me to post pictures right now even though I've finished my contribution to Vicky's block in the Pines group and have pictures of three cakes that kept me busy all day today, so I have lots to show and tell. My son and family have driven up from Quebec and we're all getting together on Saturday at my daughter's. She thinks my problems stem from a dying monitor. She has a spare one and has offered it to me.

Sunday, May 17, 2009

FFT#7 - Reneta's block

Reneta's round block will be on it's way tomorrow. The little angel in the centre now has a circling of beads and I filled in her wings with chain stitch using a single strand of the Oasis thread we have been discussing on the message board. I also made a trailing vine of bullion roses and buds over one of the seams.

Thursday, May 14, 2009

Gumpaste Fuchsia Tutorial - Part 1


Fuchsias are the prettiest flowers I am making these for a competition cake later in June. I'll be taking pictures at each stage and writing instructions in the form of a tutorial.
Here are some real fuchsias. The colours and shapes are so varied. I'm making a purple and dark pink colour combination and I'll be making them double; similar to the one below, but opposite with the darker petal on the top.

  1. Colour the paste you will use for the petals. You need three half stamens and one long stamen for each flower. Cut the tip off the long one.
  2. Cut a 3" piece of 26 or 28 covered wire and bend a little hook at the end.
  3. Take a small piece of paste and form it into a small rectangle.
  4. Moisten very slightly, the inside of the paste and wrap it around the stamens and wire at the join.
  5. Roll gently with your finger, back and forth, until the paste has spread up and down the wire and is smooth.
  6. Leave to dry.
  7. This is the set of fuchsia cutters. and the tooling pad I am using.
  8. To make the first row of petals start with a small ball of paste and form it into a "Mexican hat".
  9. I used the wooden tooling stick to roll out the paste from the centre outwards, leaving the "hat". If the "hat" part gets too long, then cut it off.
  10. Then I placed the cutter over the hat part and cut out the petals. I turned it upside down and put the hat into the hole in my mat.
  11. I used the ball tool to soften the petals.
  12. I moved the petals to my board, turned the petals the right side up and used a tooth pick to frill each petal edge. Use a little cornstarch to stop the toothpick from sticking or tearing the paste.
  13. I made a small hole in the centre of the flower, moistened it, and pushed the wire from the stamens into the hole far enough in so that the paste on the stamens is level with the petal.
  14. I held the flower upside down by the wire and brought my partly closed hand down over the petals to give them a rounded shape. Hang them upside down to dry.
  15. To make this a double fuchsia, I cut out a flower, this time without the Mexican hat. Tool it to thin the edges, then frill the edges. I use the wooden tool and a toothpick.
  16. The I pushed this petal up the wire and on to the Mexican hat part of the flower. I had moistened it slightly.
  17. Push it all the way up to the base of the other petal, and make sure that each of the new petals is over the space of the first ones.
  18. Hang to dry. To be continued ....... I have the next step in the process, but I cannot seem to get the photos to the bottom of this post. So I will create another post and place it right below this one........                 
*********************
"JUST RELEASED!"
My New (August 2011)
 *** Flower Tutorial Booklet*****


If you love making gumpaste flowers, please read
about my new Gumpaste Flower Tutorial  
which is available in Booklet form or PDF.


The tutorial covers these four lovely flowers:
Tulip, Gardenia, Lily of the Valley and Daffodil. 


Check it out at my Etsy shop here 

Tulip


Gardenia

Lily of the Valley

Daffodil

Fuchsia Tutorial - Part 2

This will be the calyx, the outside part of the fuchsia. Using the second colour paste, start with a small Mexican hat shape. Roll out from the middle until the centre post is about 1/4" and the paste is thin, but not paper thin. This is the calyx cutter. The hat part of the paste needs to fit into the hole, so roll it between your fingers until it is about the right size. You may have to lop a bit off the top. Now it's cut and still inside the cutter. It will not drop out because some of the "hat" is wedged in the hole. Use your paintbrush end to push it out. It won't be a pretty sight, all squashed, etc., but just rebuild it with your fingers until it is a neat shape again. If you are using a metal fuchsia cutter you will not have these problems.
Using a pointed stick or the end of a thin paintbrush handle make a hole right up the middle of the calyx. Tool the petals slightly so that the pointed ends raise upwards. Now, push the calyx onto the dried petals which you have already moistened slightly. Keep pushing gently until it covers the pink petal base. Smooth around so there is no pink showing through. Gently curl the calyx so that it is folding back from the pink petals. There's still the little seed bud to add at the top of the calyx. And then I will dust and steam. So, there you go, this is the fuchsia. It looks so complicated, but once you see each step separately, it's not rocket science!