Thursday, November 27, 2008

East End Cake Decorators - Sunday, December 14th, 2008

NEXT MEETING will be held at St. Margaret's in the Pines Church, Lawrence Avenue and Kingston Road, from 2pm to 4pm. Gift Exchange: Those wishing to participate in the gift exchange will bring a wrapped gift purchased for not more than $5, or homemade. Treat Table: Members wishing to do so are encouraged to bring an item for the treat table. Show & Tell: We will have a show & tell relating to tools or techniques. Anyone with a new tool to show and perhaps demonstrate, an old tool now out of use that would be of interest, a favourite technique, or a problem is encouraged to bring them. Workshops: There will be two workshops: Graham wafer houses, and Graham wafer sleighs. Members are asked to bring royal icing, bags, tips, small pre-made decorations, dragees, sugars, sprinkles (basically whatever they brought to the cookie-decorating day), and a serrated knife for cutting the crackers. The Graham wafers will be provided. Hope to see you there! Diane M.

Welcome Brynn!

This little sweater has been tucked away for a few years just waiting for that first grand daughter. Well Brynn arrived on the 15th November. She's in Quebec so I won't see her and the family until Christmas, but in the meantime I'm wrapping up a Welcome parcel to send to her and I'll include this and a pair of frilly tights!

Wednesday, November 26, 2008

A Penguin Tutorial

What a day I've had with these cute little guys! Wednesday afternoons are my sugar days with my friend Verdie. Today our mission was a flock of penguins for my grandson's birthday cake in ten days time. As we were experimenting with the little creatures I took photos, so it is going to be a tutorial of sorts. I will start with the finished flock.
To start, using gumpaste or a mixture of gumpaste and fondant, or fondant with some tylose or gumtrag, measure some pieces of white paste about 15 grams each for the bodies.

Form them into the shape of the body, as above and push a toothpick into it to hold the head later.
Next, using black paste, make pieces 4 grams for the head and roll into balls. Next, make the eyes and beaks. For the eyes, roll white paste very thinly and cut circles with a #6 piping tip. The little circle will be the cornea. Cut the same out of black paste and divide it in two, make a ball and flatten it for the pupil. Stick in place on the head. For the beak, cut a small square, I had to trim it smaller than the cutter below. Press with a pin to fold it in half. Press the pin flat into the head to make a small indentation. Brush a little water into the indent and gently push in the beak.


Cut out the wings and feet from black paste using small heart cutters for the feet, and an oval cutter for the wings. You may have to trim the hearts to fit. The oval shape gets cut in half, and it's glued with the rounded side to the front.
Make a small cone of coloured paste and work with a pointed modelling stick to create the toque. Push the head onto the toothpick, adding a little gum glue to keep it in place. Then glue the toque in place.
Now, aren't they just the cutest little guys!!! If you make the penguins for your own cake, I'd love to see the finished result. Leave me a message please! My finished cake is posted here on December 8th. Click on "penguins" under Labels below.

Monday, November 24, 2008

Still sidetracked!

I knew if I kept going I would find my way to finish up these little atcs. Instead of cutting the piece of fabric 2 1/2 x 3 1/2, I added about 2" all around and just folded it back (as you can see in the photo below). Next time I will cut it a bit larger so that all the back is covered. I traded this one with Margreet.
I'm adding this on Tuesday. It started out as a piece of crazy quilting big enough to fold and completely cover the back as you can see from the bottom picture. The background fabric is three different shades of cream, and the stitching is a pretty variegated pink and cream perle 5 thread. The beads are silver, and the flowers are pink metallic on a pale pink organza ribbon. I traded this angel with Fat Quarter (Annet).

Sunday, November 23, 2008

Getting sidetracked!

I shouldn't be spending so much time on these little ATCs! But they're fast to do (well sort of) and they're fun. I'm kind of taken with angels in general and I've found that this is the perfect subject for me on ATCs. The fun of it is looking for suitable wings, and they can be almost anything that looks right. It's easy to embroider the wings in and they look lovely with beads, but I really like the one I made with the silver leaves, and this one with the mother of pearl is really pretty even though it's not finished yet. (Note: finished now, and photo above is the finished atc). As usual, I'm struggling with the binding/finishing and have yet to find some way that I'm happy with. I did try the applique stitch on the one below, but the layers were too thick.

Saturday, November 22, 2008

CQ Cushion

I'm making a CQ cushion for my sister for Christmas. She knows, so I can talk about it! I've only just started, and the few seams that are completed are part of the 100details challenge. It's actually amazing how many of my project contain some of these 100 details! I kept running out of seams and have to think of another project! The cushion has enough to finish the 100, so that's good. I put this 16" x 16" cq piece together with the sewing machine using the start at the middle method, and keep adding strips around and around. It gets tricky as the strips get longer, and because I didn't want great long strips of one fabric I tried to make a long strip out of two pieces of fabric. I felt really dumb when it took me so long to figure out how to get the angled join. Anyway, it's pretty strongly made so that it should stand up to lots, but I hope nobody gets to sit on it because of the beads! I was going to try and be very minimal with the beads, but I couldn't, and they kept showing up on the seams despite my good intentions.

Friday, November 21, 2008

ATCs

I came across some ATCs on Flickr and I was intrigued to try them myself. After a bit of a struggle with the corners while finishing them off, I enjoyed making them. I tried two different ways to finish, in the blue ATC I cut the backing larger and folded and stitched it to the front, with the pink I used satin ribbon. Neither way made a neat corner and I've camouflaged the corners with beads and sequins. Is there a simple, neat way to finish?

Thursday, November 20, 2008

The White Stuff

Well, this is what we woke up to this morning!

Sunday, November 16, 2008

East End Cake Decoraing Club - Nov. 16th Meeting, Cookie Decorating

A group of us from the EECD brought baked cookies and had a great time decorating them for various charities. Between the fifteen of us we decorated and individually packaged about 150 cookies. There were lots of pre-made decorations which everyone shared and the results showed such a variety of techniques and design. We paused half way through for tea, coffee and lots of goodies, and still had everything packaged up just after 4pm, in a little over 2 hours. December's meeting will be a workshop on making graham cracker "gingerbread" houses, a sleigh, and a "show and tell" by members who have interesting tools or projects. More info on the date and time soon. ********************************************************************** P.S. Here's the recipe for Lemon Curd 1 cup white sugar....4 eggs, well beaten (I remove those bits that are attached to the yolks).....1/4 lb. butter.......Rind of 2 lemons......Juice of 3 lemons Mix together and cook in a double boiler until thick. Stir often. Takes about 20 mins. or less.
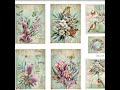
Tatting heaven

Was I lucky or what! At my Senior's group we get all kinds of donations. Recently a large piece of tatting was included in a bag of fabric. It was old and dusty. One of our members washed, pressed and starched the piece which turned out to be a collar. For our bazaar it was priced at $5, and I bought it. I feel slightly bad about cutting it up, but it's going to adorn many CQ pieces instead of just one dress. I already have carefully cut out one strip which I used on Detail 80a. I have been teaching myself needle tatting, but in my wildest dreams I will never create anything like this.

Framing suggestion

I came across a small fibre arts show on the weekend and this entry is such a clever idea I had to share it. These are three small, about 6" x 8" needlepoint pictures, mounted on long straight twigs. It could easily work for CQ blocks too.
Unfortunately I do not know whose work it is. Maybe at a later date I can find that out and give them credit.

Friday, November 14, 2008

Lots more details

Did a lot of airport embroidering this past week. There's a few missing details in between, but I'm finally caught up and maybe a bit ahead as Detail 84 is due today.
Detail 78 Detail 79a Detail 79b Detail 80a
Detail 80b
Detail 81a
Detail 81b
Detail 82
Detail 90d
Detail 86
This detail is only one bullion in the original sample, but I did it three times, first bullion 25 wraps, second was 35 wraps and the third 45 wraps, all of Caron wildflowers embroidery thread. I think they look like lollipops.

A great visit with my sister

I took a few days this week to visit my sister in New York. Both coming and going mum and I had connections in Washington for Newark. So with one thing and another (delays, missed connections, etc.) I had lots of time to CQ in the airports. It was also the chance to hand deliver the block I had made for her yoga studio. Here is my amazing sister:

Friday, November 7, 2008

Moving right along...Details 70, 74b, 76a, 76b/1 & /2, 77a & b

We're at the three-quarter mark of our 100 details in 200 days. I don't know how the first group, a couple of years ago, did the 100 details in 100 days! Here are the latest. This is detail 70, totally in gold.
Detail 74b

Detail 76a, 4mm silk ribbon embroidery

Detail 76b/1

Detail 76b/2

Detail 77a

Detail 77b